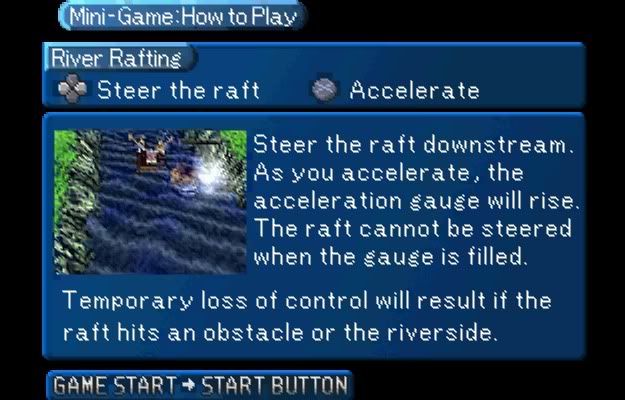
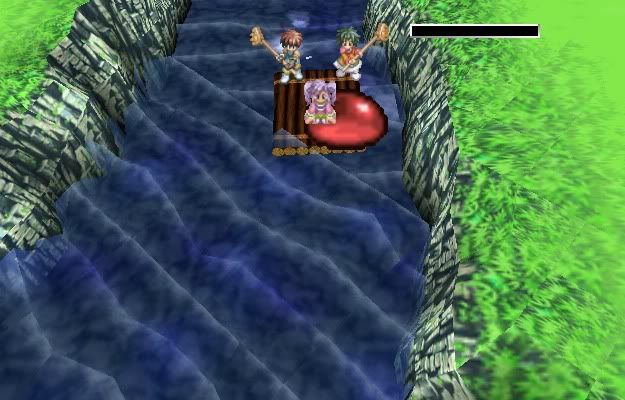
| RACHEANS PIER Paolo will be using his Water Craymel skill to calm down the river.
- The safest way is also means do not use the acceleration button at all. - Please read the rafting route details below. Part 1 ------------ Rafting route: - Departure from the starting point lays a long range. Accelerate a bit - After the 1st easy right turning, be on a little bit left and step on the gas. Remember to cool down when approaching the waterfall. - Accelerate a bit on the left. - Prepare to turn left at the FIRST INTERSECTION. - Accelerate a bit on the left side. - Accelerate a bit on the right side. watch out for a rock in front on the left side. - Left turning. - There will be a GROUP OF ROCKS to slow you down; the 1st will fall off to the left side, the 2nd is quiet on the left, the 3rd is a self-targeting from the middle point to the right side, the 4th will fall off to the right (Be on the right/middle side. Pass the 1st rock by accelerating a bit forward, You will be on the middle position now. When you are next to the 2nd rock, move Southwest to avoid the 3rd rock, accelerate forward leaving the rock no 3 and 4 behind.) - Accelerate a bit on the left side. Another rock will fall off on the right side. - At the SECOND INTERSECTION. It is easier to turn left. It is also a good choice If you choose to turn right. - Accelerate a bit on the left side. - Turn left at the THIRD INTERSECTION 'cause there is a rock and a log on the right side. - At the FOURTH INTERSECTION, you can choose to take left or right. If you choose left, there is a rock and a log ahead. (A bit faster) If you choose right, it is safer. - Accelerate a bit on the right side Right turning - Accelerate a bit on the left side. There is one rock on the right. Waterfall ahead. - Accelerate a bit on the right side. Right turning ahead. - Accelerate a bit on the right side. On the left are a rock and a log. It is a narrow space, so be careful. Waterfall ahead. Right turning. Easy left turning. - Now it is your last chance to speed up. Take your best position, (A bit closer to the left side-the screen will adjust) step on the gas. No awarded Title: ??? It seems there is no awarded title, this time. I manage to finish it two times without having any crash or bounce, not even once. However, nothing comes up. It is just a side event, this time.
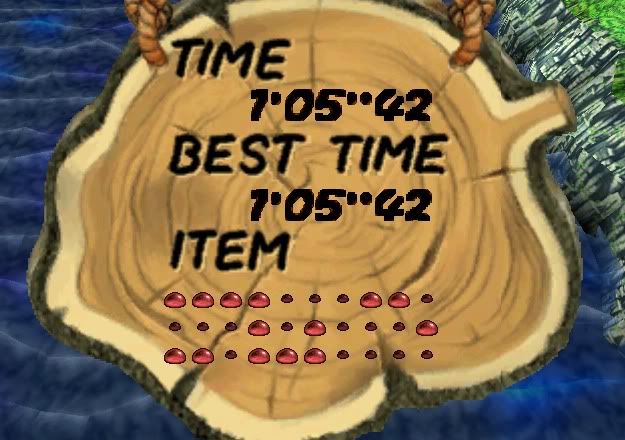
Awarded Title: *Master Coxswain* (Kajitorimeijin) (Get below 1.06.00! even if your time is 01.05.59) Awarded Items: One Apple Gel for every four Red Gels you pick up.
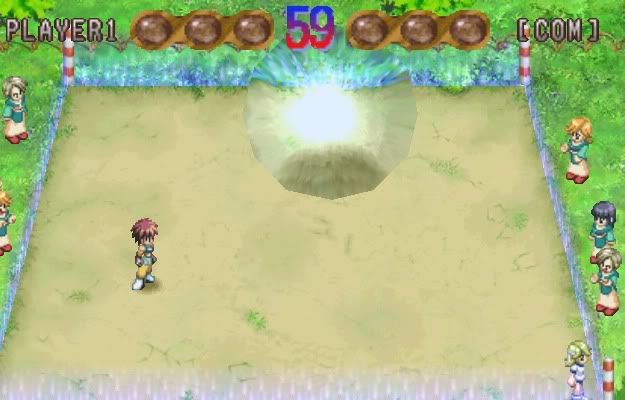
MINTCHE It is time to get back in shape dude. Come on and try your best (run?) shot.
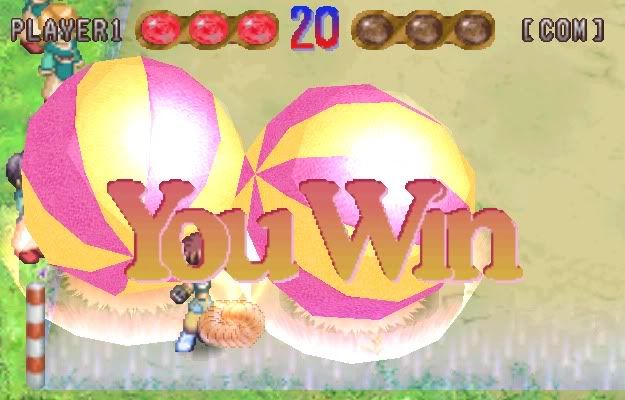
- If it is a draw game, then you will have a Final Game. Previous score will be on the screen. This time you will have 2(two) balls rolling around. However, if the score is 3-3, you will be the loser. - You need to win three times in a row to become a real winner. Suggestions: - You only have 60 seconds; so do not waste your moves. You need to aim fast, run fast. - Try to match the ball's color and repel it to smash your opponent. - Sometimes the best defend is ...to run fast or to stay at the corner. - When you have the winning score (2-0 or 2-1), just tail your opponent. When you both get knock down by the ball, it is to your advantage. Part 1 ------------ Awarded Title: *Master Roller* (Korogashimeijin) (Play it the first time you arrive at Mintche/low level) Awarded Item: No item
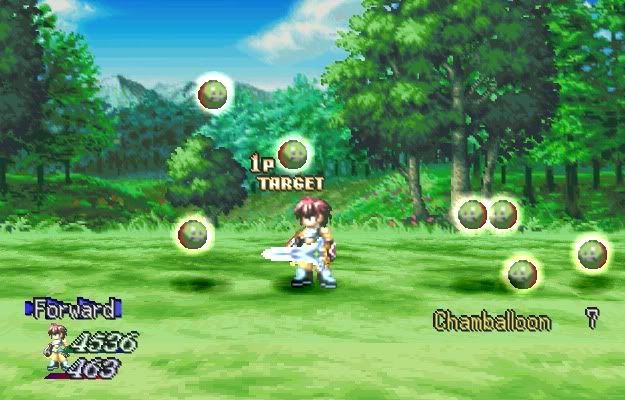
General Notes: - Remember that the fences can bounce you back when you touch them. - When you reach higher level, there will be two balls rolling around on a normal game and three balls on a draw game. BAROLE When you arrive at Barol, you will meet a merchant who challenge you the Arithmetic game. (North of Fountain) ARITHMETIC How to play: - There are three piles of stones. - Take turns taking the stones. - The one to take the last stone wins. - You can take one to three stones each turn. - You can quit anytime by pressing the circle button Suggestions: - You can choose to take first or second turn. Choose wisely. Count before you choose. General notes: - It always starts from level 10. If you fail or if you quit, the level will drop. - Reenter the town to start again from level 10. Awarded title: *Mathematician* Awarded Item : Melange Gel (level 2) CHAMBARD How about some exercise at the beach? CHAMBALLOON GAMES How to play: - Attack and destroy all of the floating objects. Finish in under the Target Time to win. Suggestion: - You should unlock new fighting skills and apply it to this mini game. Notation:
- REID's SKILLS
CD 1 # First Meeting (after defeating Sylph) Consist of 5 rounds Weapon used : Dao Blade Round 1 TT: 04.83 AT: 03.70 BT: 03.56 JTS: 2%2%3% ETS: 9% How1 : Run - slash - run - slash - run - (close)DLH TT: 04.83 AT: 03.00 BT: 02.83 JTS:7% ETS: 9% How2 : (or move forward)Run forward a bit - TS - TS Round 2 TT: 03.66 AT: 02.00 BT: 01.86 JTS: 8% ETS: 9% How1 : Run - jump right and slash - DLH TT: 03.66 AT: 02.10 BT: 02.00 JTS: 7% ETS: 9% How2 : Run forward - jump forward (when you are close to the balls in the air) n slash - TS Round 3 TT: 06.00 AT: 03.46 BT: 03.33 JTS: 5% ETS: 9% How1 : Jump up and slash - DLH - jump up and slash TT: 06.00 AT: 01.90 BT: 01.80 JTS: 6% ETS: 8% How2 : TS - left - (or) TS Round 4 TT: 07.00 AT: 06.00 BT: 05.83 JTS: 5%3% ETS: 9% How1 : Run left - slash - run right - jump right and slash (3 balloons) - run right - DLH TT: 07.00 AT: 06.00 BT: 05.43 JTS: 4%7% ETS: 9% How2 : Run or walk forward a bit - TS - left n run - TS - (or) TS Round 5 TT: 06.00 AT: 04.60 BT: 04.56 JTS: 8%5% ETS: 9% How1 : Run right - (close)DH - move right a bit - DLH (must hit the upper balloon first) TT: 06.00 AT: 03.40 BT: 03.23 JTS: 8%5% ETS: % How2 : Run right - (close)DH - move right a bit - slash (hit the bottom one) - DH TT: 06.00 AT: 03.90 BT: 03.53 JTS: 9%3% ETS: 11% How3 : TS - TS - (or move right a bit - DH) left - SA Awarded Title : *King of Balloons* (Kinguondobaruun) The next time you beat it, you will always get a Melange Gel. (heal 30% of Max HP and TP) Shop price: 1000G Selling Price: 500G CD 2 # Second Meeting (right after you get back from Celestia) Consists of 5 rounds Weapon used : Dragon Vein (size does matter) Round 1 TT: 03.00 AT: 01.70 BT: 01.53 JTS: 14% ETS: 16% How1 : *Move left close to the ball - right - RP TT: 03.00 AT: 03:00 BT: 02:90 JTS: 6%7% ETS: 8%9% How2 : Move left just a bit - DSA(3 hits) - Jump to the right and slash the balls - (or) ODC Round 2 TT: 04.00 AT: 03.30 BT: 03.26 JTS: 15% ETS: 17% How1 : *RP - RP TT: 04.00 AT: 03.70 BT: 03.60 JTS: 15% ETS: 17% How2 : TS - DLH - SLB TT: 04.00 AT: 03.90 BT: 03.86 JTS: 15% ETS: 17% How3 : TS - SA - RP TT: 04.00 AT: 03.70 BT: 03.56 JTS: 13%0% ETS: 15%0% How4 : TS - RP - left - (or) TS Round 3 TT: 06.00 AT: 04.40 BT: 04.13 JTS: 15% ETS: 17% How1 : *Move forward a bit - TS - TS - RP TT: 06.00 AT: 04.80 BT: 04.76 JTS: 15% ETS: 17% How2 : Move forward close to the first ball - TS - RP - RP TT: 06.00 AT: 05.40 BT: 05.26 JTS: 15% ETS: 17% How3 : Move forward a bit - TS - DSH - TS Round 4 TT: 06.00 AT: 03.60 BT: 03.36 JTS: 15% ETS: 17% How1 : (or Slash) DSA - TS - TS Round 5 TT: 07.00 AT: 05.00 BT: 04.90 JTS: 2%13% ETS: 2%15% How1 : *Run to left n slash - run to right n slash(2 hits) - TS - TS or DSA TT: 07.00 AT: 06.30 BT: 06.13 JTS: 2%3%9% ETS: 2&5%11% How2 : Run to left n slash - run to right n jump forward - TS(on the air)- left - RP TT: 07.00 AT: 06.90 BT: 06.90 JTS: 2%5%13% ETS: 2%7%15% How3 : Run to left n slash - run to right - stop n left - DSA (hit 3 balls on the right, do not touch the furthest right ball) - RP
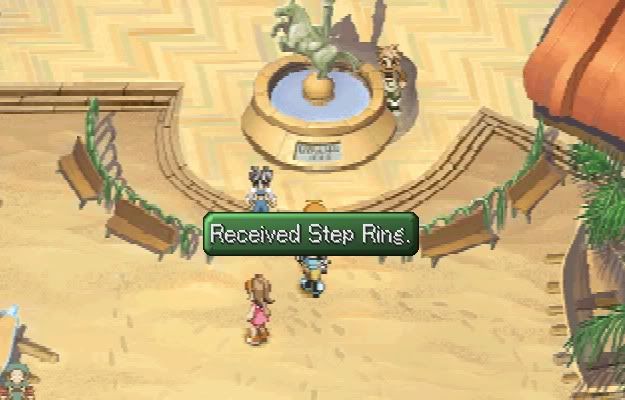
Awarded Item : Step Ring (always). Shop Price:? Selling Price: 6000G Use Rune Bottle to change Step Ring into Combo Command! Talk to the girl nearby and she will give you Uchiwa (Usawa-Japanese version) General Notes: - Completing all 5 rounds takes about 2 minutes! - Within an hour, there will be > 100 chances of boosting up your Cooking and Fighting Skills. - After completing each round, you can try to master your cooking skills. Please try to use the AUTO COOKING option. It only works for Reid :)~ - You may choose different recipes for him to be automatically cooked one after another. - You can create many different styles. The lists shown above are just a few examples. - Try to use (hold down) Shortcut Key (L2, R2 and circle), as it is very useful to shortcut the time consumed. - While running you can not use the L2 and R2 shortcut buttons, but you can still use the X shortcut button. - Every time you go up one screen, the game will restart from round 1(one). -*There is a difference between the English and Japanese version of Technical Smash points. However, it is not a crucial subject. CHAMBARD Speaking of Cooking Skill, are you ready to face the Taste Master? COOKING CONTEST How to play: - Come to Chambard Bistro and buy a ticket at the counter. - When you are ready, talk to the Announcer/Organizer on the second floor. - Select a correct ingredient every time you are asked to. Suggestions: - Pay attention to what the guest is saying because they give useful clues. Note: The answers to this quiz can be found at the miscellaneous section. CD 1 ==== Round 1 Farah Oersted Guest : Gina (she works at the Mintche University) She likes to eat Omelet Reason: Her mom always made her tasty omelet when she was a kid Clue : ZESTY OMELETTE Specific ingredients : (1) Onion, (2) rice, (3) lemon, (4) egg "Y.. y.. Yummy" Awarded Title : *3 Stars Chef* Awarded Item: No item Round 2 Farah Oersted Guest : Franco (he is the Master of martial arts at the Regulus Dojo) He likes to eat Pot Pie Reason: Long time ago when he fought monster deep in the Undine Stream and was badly injured, a merchant passed by and gave him a nutrition, full of energy Pot Pie to save his life. Clue : FULL OF NUTRITION AND ENERGY, CRUSH TURQUOISE Specific Ingredients : (1) kirima, (2) pasta, (3) egg, (4) cheese "This is it. Who taught you to make this pot pie"? Awarded Title : *Kitchen Star* Awarded Item: No item Round 3 ? The head chef is missing ?
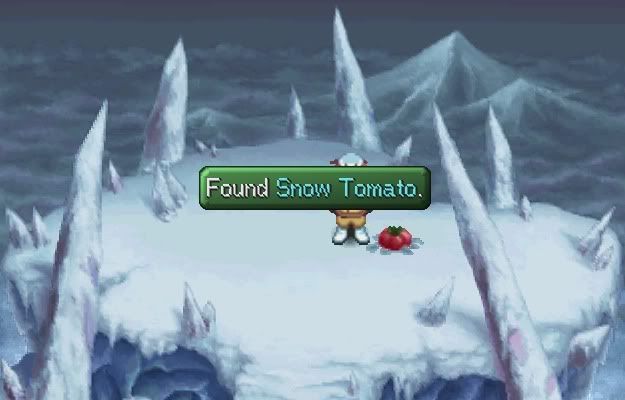
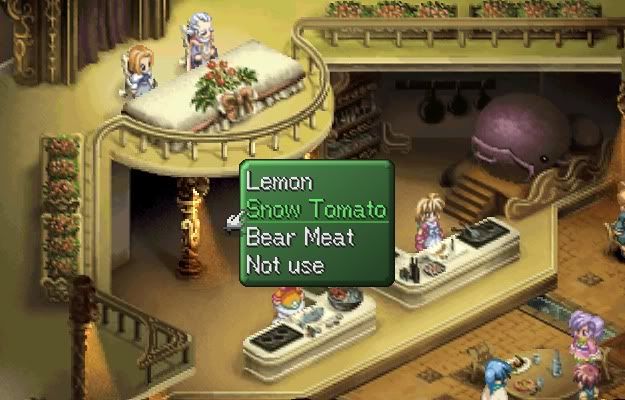
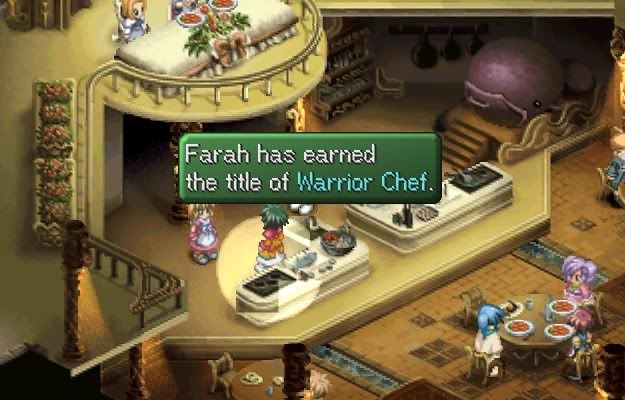
Clue : DEPTH TO THE FLAVOR, Specific Ingredients : If you choose (1)Shrimp, (2)Tomato, (3)Pasta, (4)Squid, he will taste it, but it is not to his satisfaction. The winner is the Taste Master this time. The original ingredients : (1)Shrimp, (2)Snow Tomato, (3)Pasta, (4)Squid (You need to get it from Mount Celcius-at the top) y..y..Yummmmm!! Viva la seafood pasta. Awarded Title: *Warrior Chef * Awarded Item: None General Notes: - I purposely give you the clue of each round so you can make a guess on the correct answer. That is why I put some dash signs together with an alphabet just to make it more interesting.
IMEN STATION Since you are aiming for Luishka Station, you have to start the line from Imen Station. Buy the Craymel Cage (2000G) from the weapon shop at Imen to refill the train's fuel.
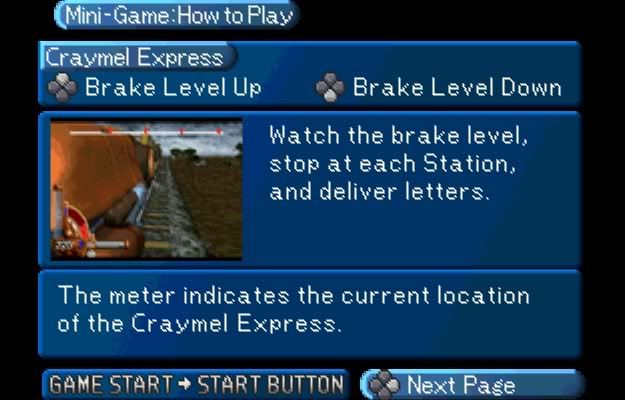
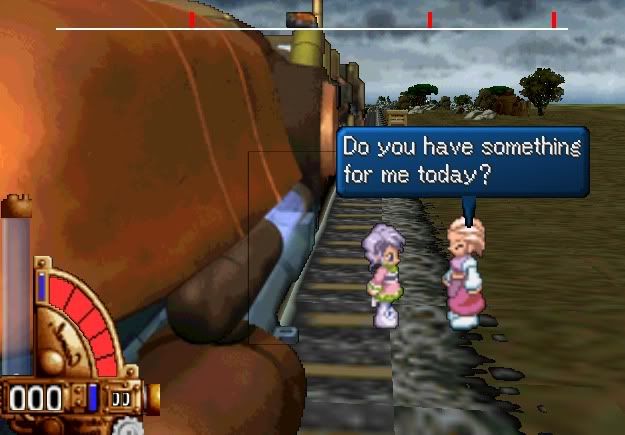
The last one should be pushed as far as the second sign board or after Reid shouted =Brake !=. - The other way is to push UP button fast right after Reid shouted =Brake=. It will stop just in time. That's it, so easy. - And that is not all. Your actual duty is to deliver letters as to complete the story involved. Keep coming back to Imen Station to deliver new letter to each person. You will understand each person has his or her own story. Finally, after delivering 3 times (without a miss), you will get a title. Awarded Title: *Choo-choo Girl* Awarded Item: No item
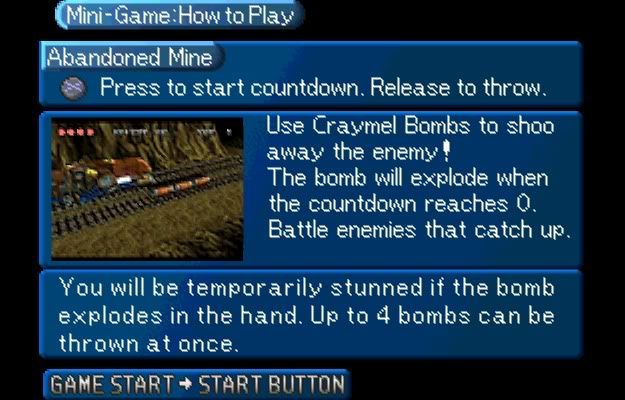
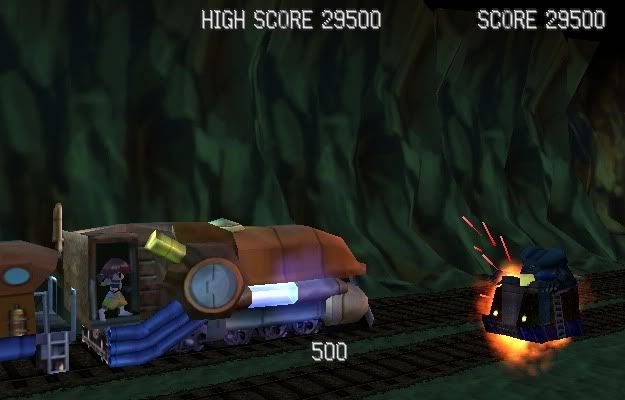
General Notes: - It contains no melee experiences, just delivering letters. - It needs good timing, but not difficult. - If you miss a station, they will complain about how bad Reid was on the control. LUISHKA STATION You are continuing journey to Peruti, but you need to get pass the Gnome Mine. On the way, monster are chasing on you (Hard Horns and Flying Soul). SPIRIT TRAIN For the very first time let them catch you. You cannot blow them anyway. This will take you to battles and increasing your chance of getting items as well as filling up monster collection. Go back to Luishka Station and talk to the conductor. However, you are not going to fight with them anymore. Instead, it is the actual mini game; you will have to release bombs to blow them out of the track. How to play: - Press the X button to release the bomb. - You have 4 bombs in stocks. Automatically replenish. - You have 6 seconds before it blows. - You can hold X button to delay your throwing. Suggestions : - No hurry in releasing bombs. Wait and check for the distance. It is good timing that really matters. When the trolley comes near or close to your train, release 3 bombs one by one (1,2,3). Save 1 bomb for emergency purpose. Remember, you can hold X button to delay throwing. - When your opponent's track is not on the straight line, you will have to wait patiently. - Practices make perfect. Awarded Title: *Trolley Bomber* (Torokko Bombaa) if you can reach up to 20.000 points. Awarded Item: No item
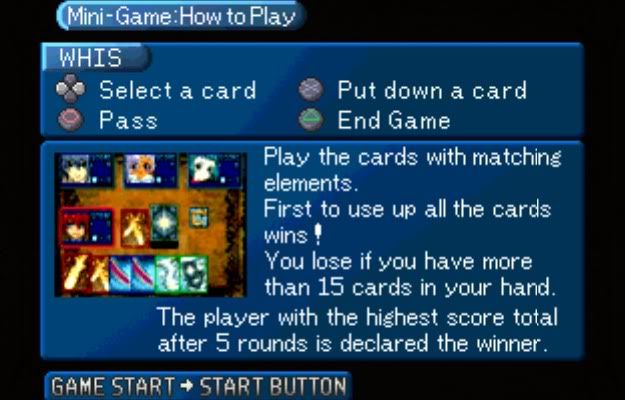
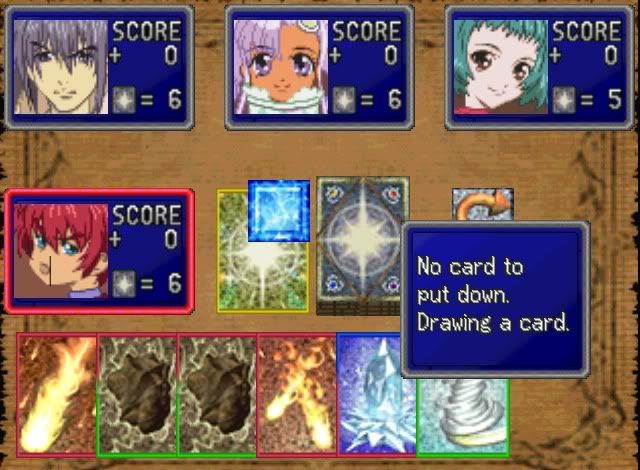
General Notes: - Monster's trolley is divided into 3 parts. Each of it has a bonus points when you destroyed it. - Condition 1: Blow it starting from the 3rd part, 2nd, then the 1st part. 1st part worth 500 points, 2nd part 2000 points, 3rd part 3000 points. - Condition 2: Blow it starting from the 2nd part, 3rd, then the 1st part. 1st part worth 500 points, 2nd part 1000 points, 3rd part 1000 points. - Condition 3: Blow the 1st part of it. You can only get 500 bonus points. - If the trolley get pass your train you will get a minus 500 points per every part you miss to blow. GNOME MINE When you reach to the second part of the Gnome Mine, Reid gets bored then Meredy will introduce Whis -a famous card game in Imen/Celestia- to the group.
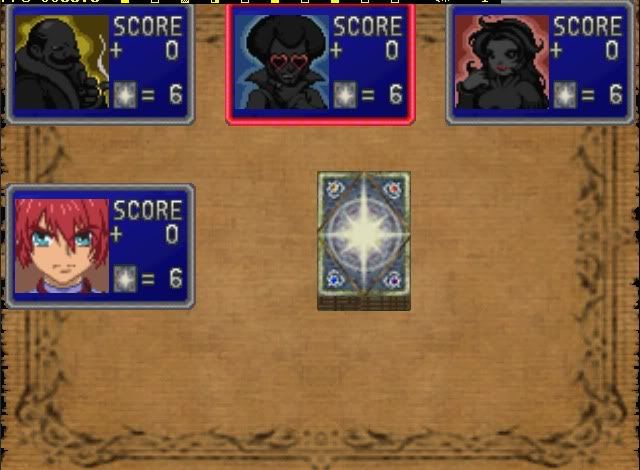
- Cards are divided into 5(five) categories. They are 1)Normal card, 2)Double card 3)Attack card 4)Change card. 5)Elements Control card(Dark and Light) Suggestions: - Read the cards explanation carefully. You may want to jot down some important notes. - Try to use the element control cards (dark n light) as your last key weapon and win the game as you will earn lots of/double bonus points. - Use attack cards to force opponents to draw more cards, and use double cards to throw more cards more than once. - Do not forget you have a chance to draw a new card and to think again which card you should throw. If you push the draw button one more time, you will pass your turn. Use it wisely. General Notes: - MATCHING is the key word. - On your first turn if you do not have a matching card, you will automatically draw a new card and lose your turn. - You can use draw anytime you want. - Every time you won, you will get a current score. It will be automatically calculated to your previous score. For example: (1) Your previous score is 12; your current score is +20, your new score will be 32 points. (2) your previous score is 12; your current score is -20, your new score will be -8 points. - Your bonus points depend on the card's quality points: 1. Normal card worth 2 points, 2. Double card worth 5 points, 3. Attack card worth 5 points, 4a) Single Border Change card worth 5 points (Prism Change Card and Wind Change Card), 4b) Double Border Change card worth 2 points, 5) Elements Control card will double your winning or losing points. - It seems that the game become more difficult when you are collecting more and more points. Normal card: Use this card on normal basis (Fire, Water, Wind) in order to match your opponent's card. Double card: (Double Fire Card) - If you have 2(two)or more double fire cards, you can use both cards in a row, plus accompanied by 1(one) normal fire or change ice or fire attack card or even a fire attack card. That means you can throw 3(three) cards in one turn (or more, depends on how many double cards you have). Nice :) And if you use Fire attack card as your last card, you are forcing the opponents to draw more cards to your advantage! - When you use a fire double card without a matching card, you need to draw a new card. If then you get another fire double card and you use it, you must draw another new card. Now, if you still did not get a matching card, you will be automatically passing your turn. - If your last card happened to be a double card and your next opponent last card is a match to your double card, that will announce your opponent as a winner because you still OWE one matching element card to accompany the double card you have just thrown. Attack card: (Fire Attack, Water Attack, Wind Attack) - If you throw an attack card and all of your opponents does not have a matching card, then the (next)opponent No.1 have to draw 2(two) new cards, opponent No. 2 and 3 have to draw each of them 1(one) new card. - If you throw an attack card and opponent No.1 also use an attack card, and opponent No. 2 does not have one, then he or she will have to draw 4(four) new cards, and if (the rest of opponents) opponent No.3 does not have it either, he or she needs to draw only 1(one) new card. - If all of your opponents use an attack cards and you do not have a matching card, then you have to draw 2X3(players) = 6 new cards!(Attack card works like a multiplier. If you use it and opponent No.1 and 2 each of them throws an attack card and opponent No.3 does not have a matching card, then No.3 has to draw 2X3(players) = 6 new cards.) - If you use an attack card and all of your opponents each of them throws another matching attack card and you do not have a stock of matching attack card anymore, then you have to draw 2X4(players) = 8 new cards!! Phiuu Imagine if each of you (4 players) own 2 attack cards. It can bring a result of chain combos. Means 2X4(players)x2 = 16 cards!!! You think it is not going to happen? Wrong! It just happened to me for 14 cards!! (And I made Farah had to pick up 14 new cards!!) - This one is interesting. If everybody throws attack cards, and at last (on the second turn) there is one player run out of attack card, he or she has to pay for it, even if the player has already thrown all of his cards. (even if the quantity of card on hand is zero). - The safest way to use an attack card is when you have a spare matching card or another attack card, just in case. Change card: (Wind Change Card, Prism Change Card, Ice, Volt, Earth) - Be careful when you use the Wind-Change Card. You must observe and predict your opponent's cards. Example 1: Farah (opponent No.3) has only two cards left on her hand. She throws her Wind normal card to you. Do you want to use your Wind change card? (It is the only wind matching element card you have) or to draw a new card? You may not want to use it because the game flow will reverse (anti clock wise)and Farah will get (again) her turn to throw her last card. Who knows what her last card to be? If she has another wind matching card, You will be sorry. Example 2: Keele (opponent No.1) use a normal wind card, you only have 2 cards left (a Wind change card and a Wind normal card). I recommend you to use the Wind change card since it will force the game flow starts from Keele again. If he throws a wind card, you are the winner. - Pay attention to the card's border. There are 2 types of borders. One is single border and the other is double border. The lower border represents the element you can change. The upper border shows the element-to-be. - You cannot put a single border change card on top of another single border change card. However, you are allowed to put a double card on top of another double card as long as the borders match (top border match to lower border). Element Control card: (Light, Dark) - Use this card as your last key weapon card. (Dark and Light) - It offers lot of helps, but it will not work when the opponent is asking for you to throw an attack card. - When you have 2(two) Elemental Cards, your winning/losing points will be tripled? Draw or Pass: - When you do not have a matching element card and you push circle button, you will draw a new card. - When you still have a matching card and you push circle button, you will pass your turn. - USE DRAW when none of your opponents has a matching card. Use it repeatedly when they still do not have it until you get the card you needed. For example: When you want to use a DOUBLE FIRE card and you do not have the other NORMAL FIRE card or CHANGE ICE card or FIRE ATTACK card to accompany. Use draw repeatedly until you get the one you need. When you do that, the amount of opponent's cards will also increase every time you draw a card. Take that to your advantage.
Won by quantity: - If the opponent has more than 15 cards, he or she is a loser. However it has an effect on your bonus points as every card on your hands will only worth lower than it should be. This could bring a big disadvantage, but at least you are the winner. (After that 15 minutes and all I get is only 6X2points = 12 points. *sigh*) - If you have more than 15 cards, then all of your opponents will get the same amount of winning points. Awarded Title: No Title Awarded Item: No Item
Awarded item: 25 jini. PERUTI Captain versus captain
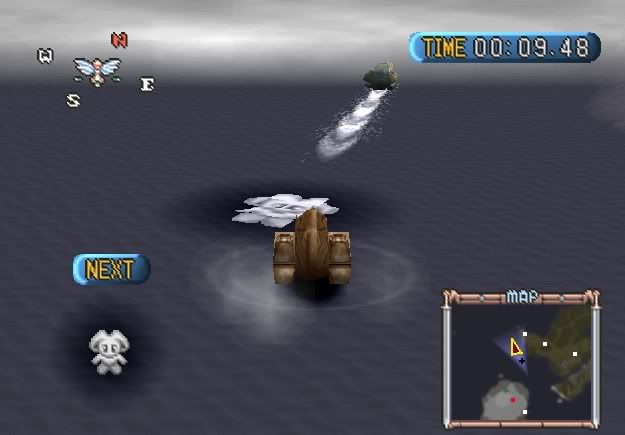
- The controls for your ship are the same as usual. - Press square button to quit. Suggestions: - You need to memorize the specific route. It is best to try again for a few times. You must rely/concentrate on the map. - Do not get crash with the captain's ship since it will only waste your time. Sailing Route: - (No need to hurry when you start the race, but you can try). Try to shortcut your route by sailing nearby the edge. - In the middle of the race, while passing through the Gnome (fourth) checkpoint, step on your gas. You may pass Celcius checkpoint in front of him. Gas. You will lead the race. Go (South) to Volt, and find a shortcut way to Rem and Shadow (go by the edge of the ocean-West side). Go pass the two tiny island near the edge to cross Maxwell checkpoint. Pass through Sekundos and go along the edge until you reach the finish checkpoint. There are 10 Checkpoints you need to pass through and one finish point:
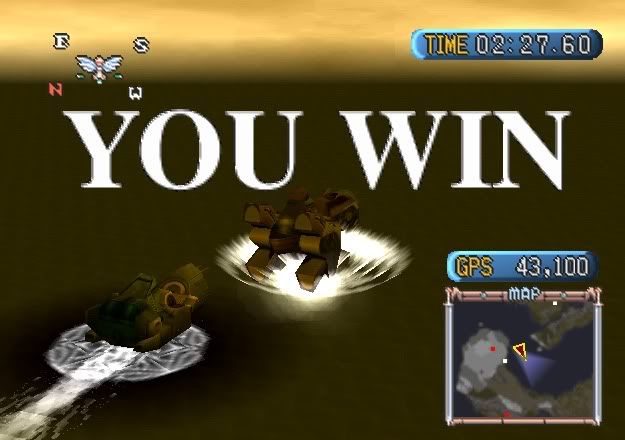
General notes: - He will praise you and your ship if you win. And he will ask you to find a new captain for the Van Eltia if you loose. - It is useless to win the race from the beginning since he will catch you up on the third checkpoint. His ship is much better on a long-straight track. Your crucial moments begin from checkpoint No. 4
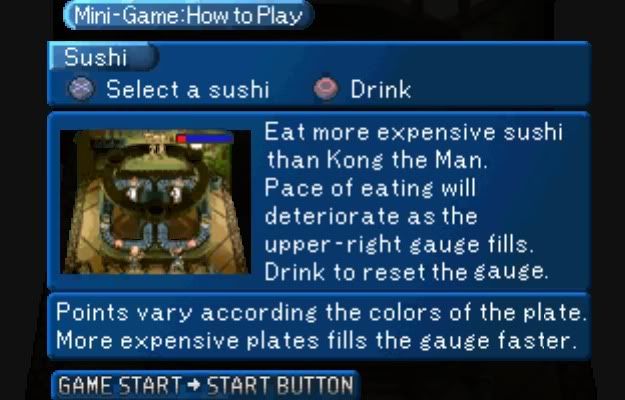
Awarded title: *First Officer* (Chat's title) for a record under 02.30.00? Awarded Item: No item TINSIA Where else can you eat free sushi in Celestia; Carousel Sushi EATING CONTEST How to play: - Eat more expensive sushi more than Kong the Man does. - Pace of eating will deteriorate as the upper-right gauge fills. - Drink to reset the gauge. - Points vary according to the colors of the plate. - More expensive plates fill the gauge faster. - X button to eat, O button to drink. Suggestions: - The easiest way is to pick only the plates with color (red and yellow) Pick the red and yellow plate and then drink; pick the red and yellow plate and then drink, repeat.. (you can also pick other plates in between) That is it. I beat him 10 times in a row, and you can do better.
General notes: - Entry fee is 2000Gald - White plate worth 100 points, Red plate worth 500 points, Yellow plate worth 800 points. - Kong's total points will usually be around 4300 points. - The next time you won, he will give you back your entry fee. Eating for free! Awarded title: *King of Hunger* Awarded Item: (Free eating and money back guarantee) VAN ELTIA Get ready, go!
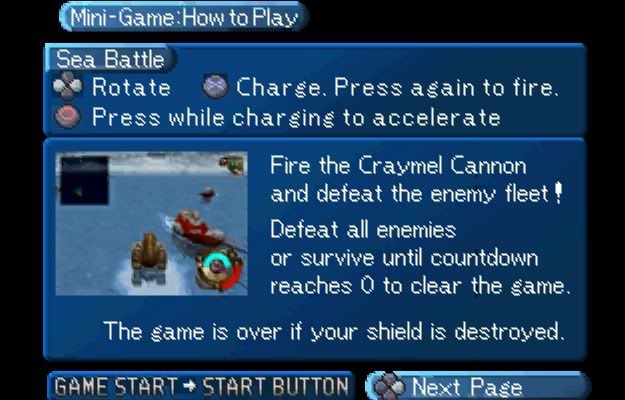
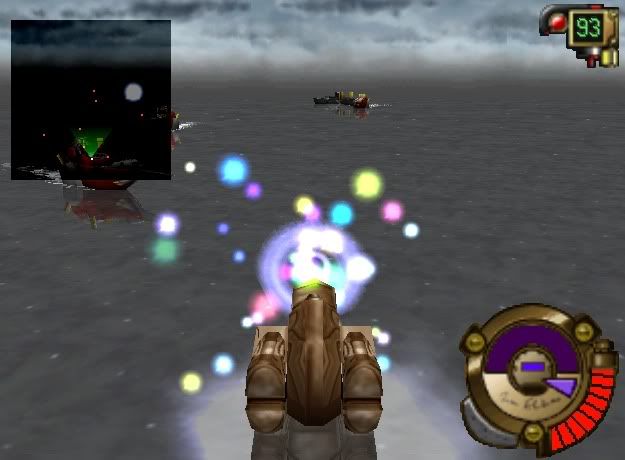
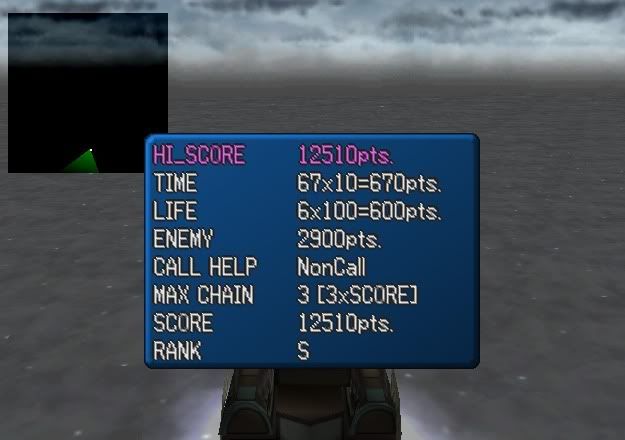
- A triangle button to switch view - Square button to execute Support Fire. Suggestions: - You need to destroy more than one enemy at one time to double your points. - Try not to use Support Fire as it will halve your bonus points. General notes: - Pay 800.000Gald at the Inferia Port to get this Ocean Wars mini game in one of your room in the Van Eltia. Chat will then get a title *Interior Decorator*
Rank: S Awarded title: *Kaiser* (When you reach 10.000 points?) Awarded item: I got nothing this time. JINI Jini's nightlife. It is full of excitements that I forgot about the time.
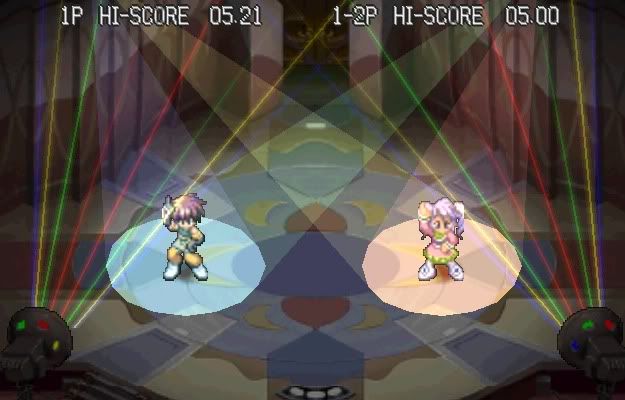
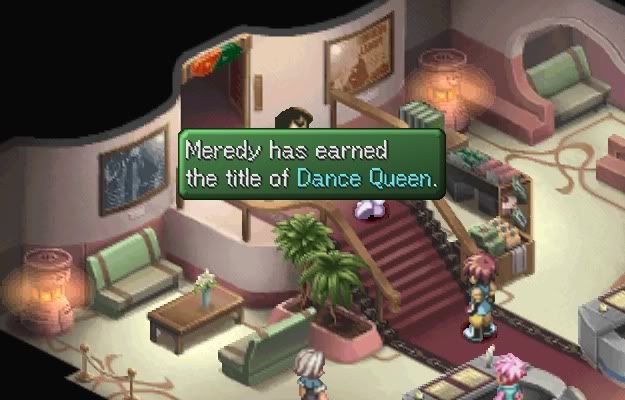
- Try to copy his pattern/movement. - It is important to pay attention on the spotlight movements. And it helps when you remember it's colors (Yellow and Red) because you are going to follow wherever they move. 1. Yellow, 2. Red, 3. Yellow, 4. Red, 5. Yellow, 6. Yellow, 7. Red, 8. Yellow, 9. Yellow, 10. Red, 11. Red, 12 Yellow (to center stage)
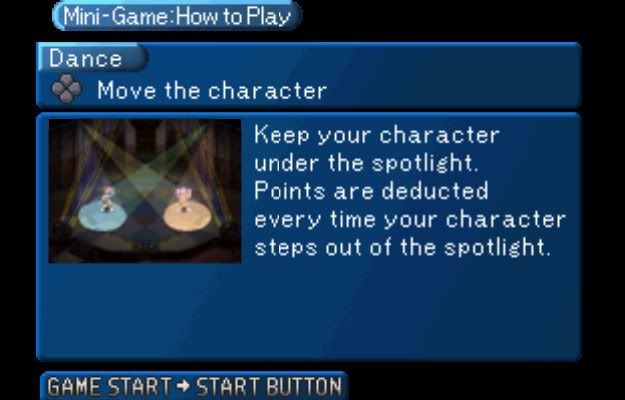
Register as a Solo challenger: Meredy will perform her dance skills. Register as a couple: Meredy plays versus second player.
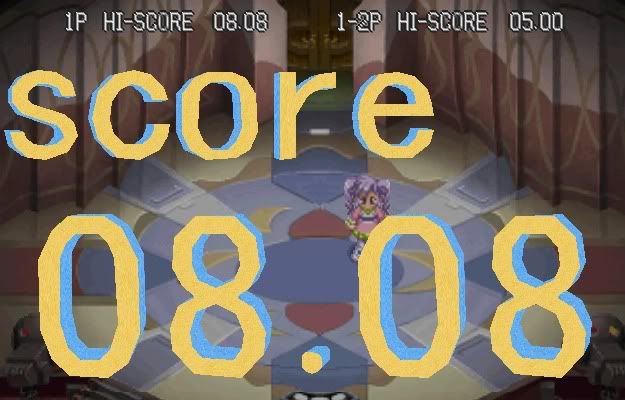
General notes: - You have to get a score above 05.00. If your score is bad, you are failing. - Points will be deducted when you are outside the spotlight circle. - The spotlight is getting faster and faster. Awarded title: *Dance Queen* (get 08.00 points) Awarded Item: Step Ring (now you have 2 of it) and 100Jini |
Categories
2NE1
2PM
action figure
anime
B2ST
Backstreet Boys
Beni
Bi Rain
big bang
Bisnis Semarang
DBSK
emulator
f(x)
home made kazoku
houshin engi
kana nishino
manga
mangaka
psp
Se7en
Seung Ri
SHINee
SNSD
song lyrics
SS501
stuff game
super junior
T.O.P
TaeYang
Tales of Destiny II
tips
video
walkthrough
wallpaper
warriors orochi
Wonder Girls
Recent Post


0 comments: on "Tales of Destiny II >> Minigame"
Posting Komentar